Getting started
A Beginner's Guide to Your Book Pro
Everything from a blank page to a finished export. See what each tab does, which button to press, and what to expect on screen.
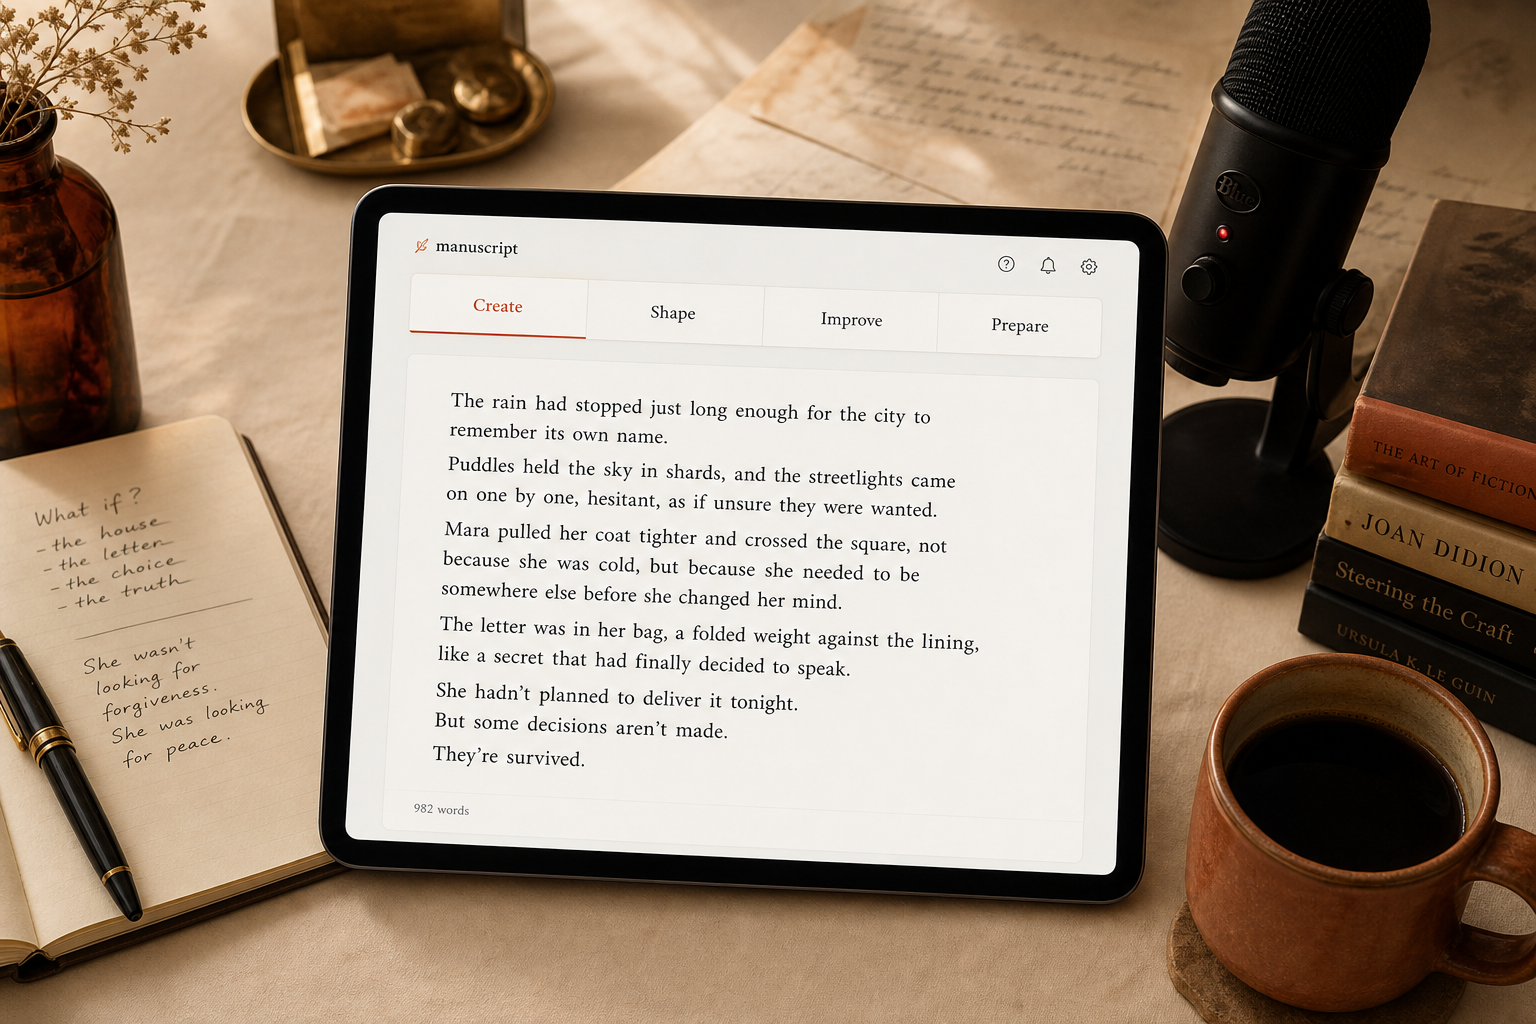
Your Book Pro is built around one simple idea: most people can say their book long before they can type it. So you speak, we write it down, and then a set of tools helps you turn that raw material into an actual manuscript with chapters, a plan, an editorial read and a finished export.
Every book you make lives in a workspace with four tabs - Create, Shape, Improve and Prepare. Create offers three ways to get material into the book - Dictate, Write and Upload - and Shape holds Plan, Edit and Sources working side by side. You are never locked into one route: most authors mix and match as they go.
How Plus works: pay as you go
There is no monthly subscription to start. Plus is pay as you go: you get 1,000 free credits when you verify your email - no card required - and recording, transcribing, typing, manual chapters and the Plan section are all included. When you want the deeper tools - AI chapter breaks, editorial feedback, proof-reading, export and publishing checks - you spend credits on them, or top up whenever you like from a fiver's worth to a whole book's worth. Credits never expire, so you pay for the book you're finishing, not for months you're not writing.
The full story of why we moved to this model is in Pay for the book, not the month, and every price is listed on the Plus page.
1. Starting your book
From your Library, press New book. You'll be asked a short questionnaire - one simple question per screen - covering what kind of book it is, who it's for and roughly where you are with it. Nothing here is permanent; it only sets the starting shape.
- Genre matters more than it looks. It changes the Plan sections you get, the way editorial feedback reads your work, and how the export is laid out. Memoir, business, fiction, poetry, children's books, screenplays, textbooks and graphic novels all behave differently.
- You can start without an account. A temporary session lets you record straight away; when you sign in, that work is attached to your account.
- All book categories are available on Plus. Nothing about your genre is locked behind a plan.
2. Create: three ways to get your book started
The Create tab is where a book actually starts, and a slider at the top of it gives you three ways in. They all feed the same raw material, so you can move between them whenever it suits you.
- Dictate - speak and we write it down. Most people talk at around three times the speed they type, which is why this is the fastest way to get a first draft out of your head.
- Write - for authors who would rather type. The slider drops you straight into the Raw material box with the recorder out of the way.
- Upload - for authors who already have the material: an existing manuscript, audio recordings, background research, or a Scrivener project.
Mixing them is normal, not a compromise. Upload an old talk in the morning, dictate a new chapter on a walk, then type the linking paragraphs at your desk - it all lands in the same book.
Dictate
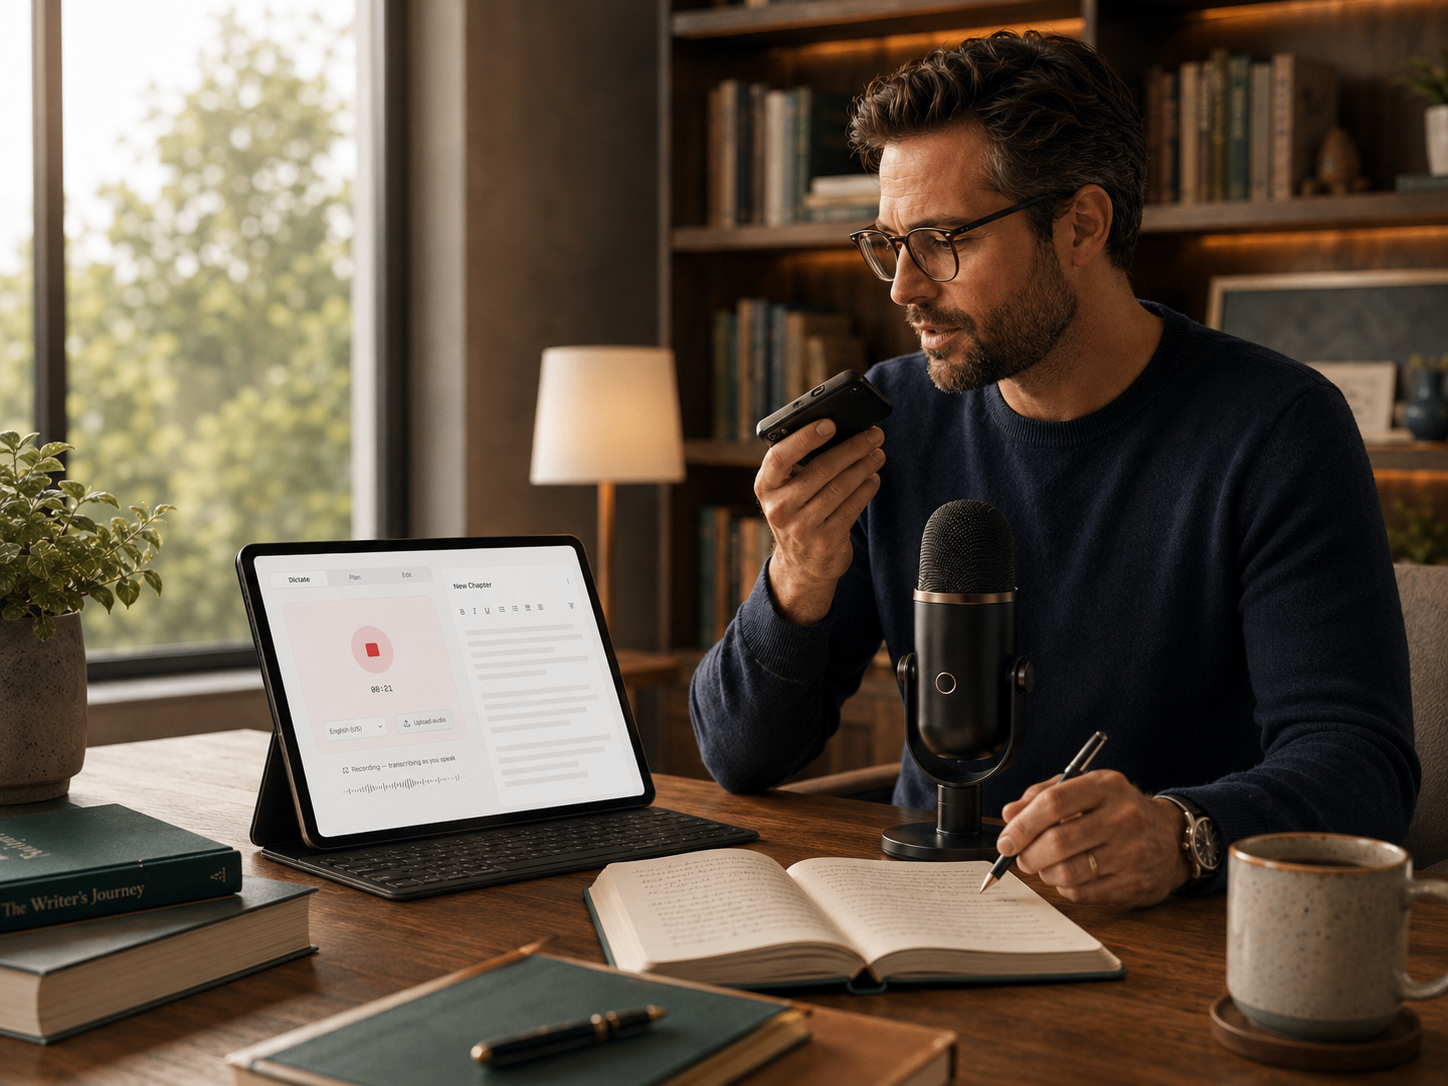
Press the big round record button and talk. There is no script and no minimum - a first session of five honest minutes is a real beginning.
Your book workspace
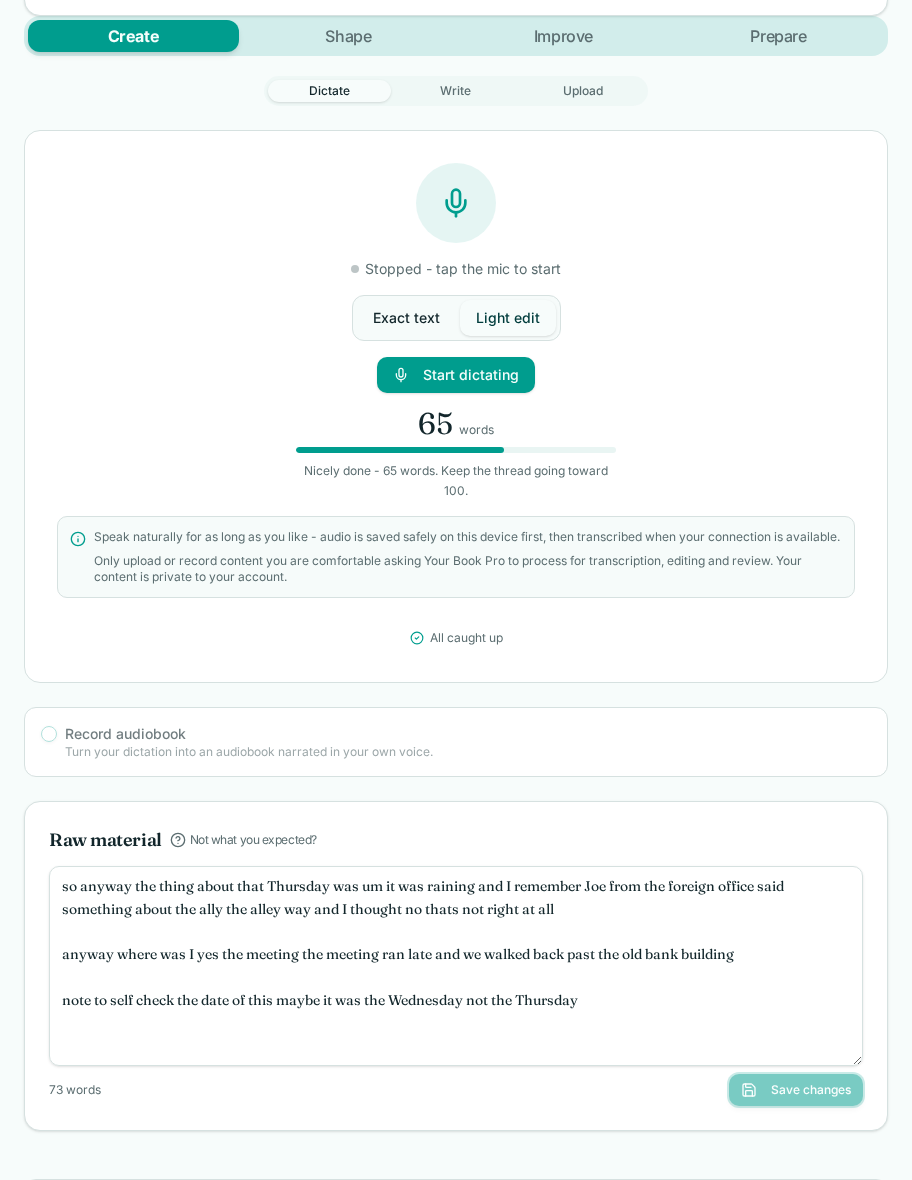
The Create tab while a session is running. Words appear as you speak them.
What to look for
- The timer confirms you are actually recording - if it isn't moving, the microphone hasn't started.
- A live transcript preview scrolls beneath the button so you can see the words arriving.
- While recording, a fixed pill stays at the bottom of the screen so you always know a session is live.
- The word counter and progress bar quietly track momentum for the session.
On screen: The privacy note and the “speak naturally” explainer sit in a single box above the recorder and hide themselves once you start recording, so nothing competes with your voice.
Write
Under the recorder is the Raw material box, and the Write slider scrolls you straight to it. It is a plain, editable text area, open from the very first second of a brand new book - you can type into it before you have recorded anything. Dictated words land in the same box, appended to whatever is already there, so speaking and typing are two doors into one room.
- Save files your raw material into the Draft Manuscript. If it can be merged into the current chapter it will be; if it clearly begins new material, new chapters are created.
- A word count sits beside the Save button, and the button flashes whenever you have unsaved changes.
- Recent recordings lists your sessions underneath, each with its transcript.
Upload
The Upload slider shows the “What would you like to upload?” chooser inline, with four choices:
- An existing manuscript - a draft you already have as a Word, text, Markdown, RTF or PDF file. It comes in as manuscript material you can split into chapters.
- Audio recordings - podcast episodes, talks, lectures, sermons or interviews. Turning an archive of recordings into book material has its own seven-step wizard and its own audio-to-book guide.
- Background research - reference material such as PDFs, documents, notes and images. This is context, not manuscript: it is never turned into your book without you asking.
- Import Scrivener Project - a native Scrivener project import, covered in section 9 and in the Scrivener guide.
While a file is being uploaded and transcribed the slider itself turns golden and reads Uploading, so you can carry on working elsewhere and still see it running.
3. Exact text vs Light edit
This toggle sits directly under the record button and it is the single most useful setting on the page. It decides how faithfully your speech is written down.
- Exact text - word for word. Every “um”, every false start, every repetition. Use this when the wording itself matters: interviews, verbatim quotes, poetry, dialogue, anything you intend to preserve exactly as spoken.
- Light edit - the same words, tidied. It removes ums, ahs, uhs, filler words and repetition for a cleaner read, and formats speech with quotation marks. It does not rewrite your sentences, change your vocabulary or add anything you didn't say.
Most authors draft in Light edit and switch to Exact text for the passages that must stay raw. You can change the toggle between sessions - it isn't a decision you make once for the whole book.
On screen: The explanatory line under the toggle updates to describe whichever mode is selected, so you can always confirm what will happen before you speak.
4. Your book dictionary
Every book has its own vocabulary - family names, place names, an invented world, technical terms, a spelling you insist on. Transcription cannot guess these, so Your Book Pro lets you teach it.
Your book workspace
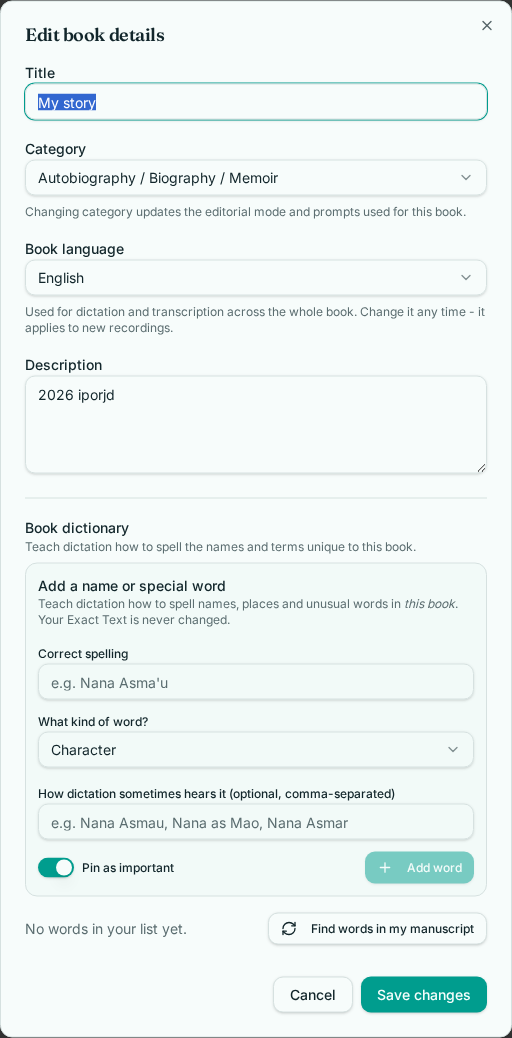
The book dictionary. Open it from the Edit book details dialog (not the Shape → Edit tab), or from the 'Not what you expected?' link above the raw material box in Create.
What to look for
- Add the correct spelling first, then list the ways it gets misheard - separated by commas.
- Refresh suggestions scans what you have already dictated and proposes entries you may want to fix.
- Entries are per book, so a memoir's family names never leak into your novel.
Once an entry is saved, it is applied automatically to every future transcript for that book - including audio you upload rather than dictate live. Add three or four names before your second session and the difference is immediate.
5. Adding recordings you already have
If your material already exists as podcast episodes, talks, lectures, sermons or interviews, there is a dedicated seven-step wizard for turning that archive into book material - with its own transcripts, themes, chapter spine and drafting options. That process has its own full guide.
Uploading existing audio, managing sources and drafting from transcripts is covered separately.
Read the audio-to-book guideEverything else in this guide applies whether your words arrived by microphone, by keyboard or from an uploaded recording.
6. Shape → Plan: the shape of the book
The Shape tab has its own slider with three parts that work side by side: Plan, the thinking, Edit, the writing, and Sources, the material behind both. They are deliberately one slider apart - you can adjust a plan box, flick to Edit and write the chapter it describes, then flick back, without ever losing your place. Plan is where the book stops being a pile of words. It is a set of short boxes, chosen for your genre, that hold the thinking behind the writing.
Your book workspace
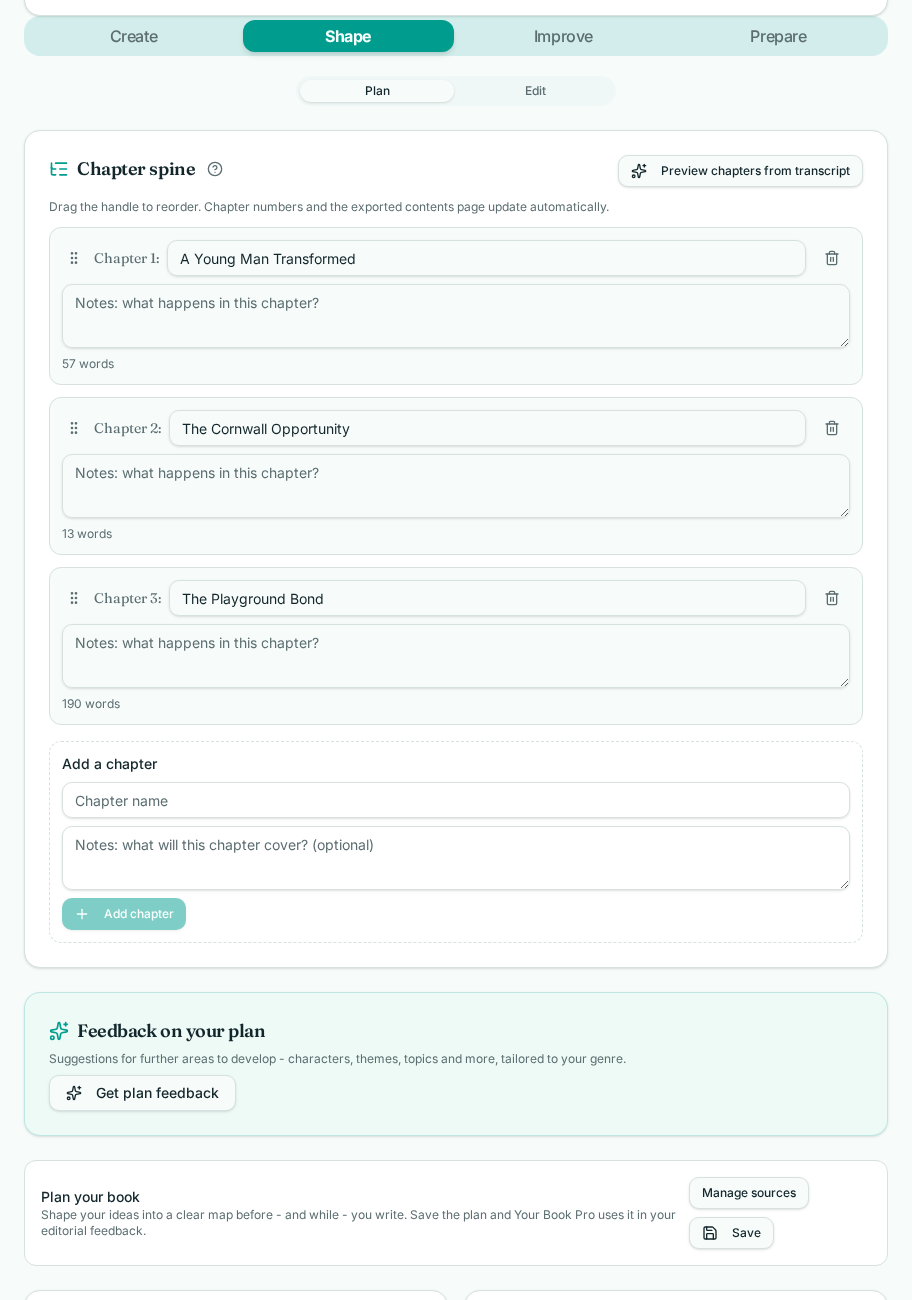
Plan sections change with your genre. A leadership book gets Core idea, Ideal reader, Framework and Proof; a novel gets Premise, Characters, World, Conflict and Themes.
What to look for
- Each box has a one-line hint under its title telling you exactly what belongs there.
- A 'Need help?' button opens a longer explanation with examples if the hint isn't enough.
- Nothing is compulsory - a half-filled plan is still far better than none.

Sections you can build up yourself
Where a section holds a list rather than a single answer - characters, places, key people and similar - it is made of individual items you can add, rename, reorder and delete, so the plan grows with the book instead of being one long text box.
Plan collects things from elsewhere
- Pinned feedback. Any editorial suggestion you find useful can be pinned, and it appears at the bottom of Plan as a working note rather than a one-off comment.
- Planning suggestions from your sources. When material is attached to the book, suggestions drawn from it appear in their own card showing Your plan now beside Proposed. Nothing enters your plan until you accept it.
- The chapter spine. Once you approve a chapter structure, those chapters become real, selectable chapters next door in Edit.
7. Shape → Edit: chapters and the manuscript
Edit is the writing room, one slider away from Plan. At the top of it is the Editing Suite - a book-aware editing surface that knows your genre, your plan and your manuscript so far, which is exactly why the parts of Shape sit together.
The Editing Suite is the one-stop shop for editing your document. Ask it in plain English to move or reorganise chapters, suggest changes to a passage, or advise on a deeper revision. A basic request costs 20 credits; more in-depth editing advice costs 100. You see the exact price before anything runs, and you approve every change before it touches your manuscript. Pro includes it.
Ask the Editor is the companion to it: the place for discussion, questions and guidance about your book. Use Ask the Editor to talk something through, and the Editing Suite when you want the document itself worked on. Neither writes your book for you - both propose, and you decide.
Your book workspace
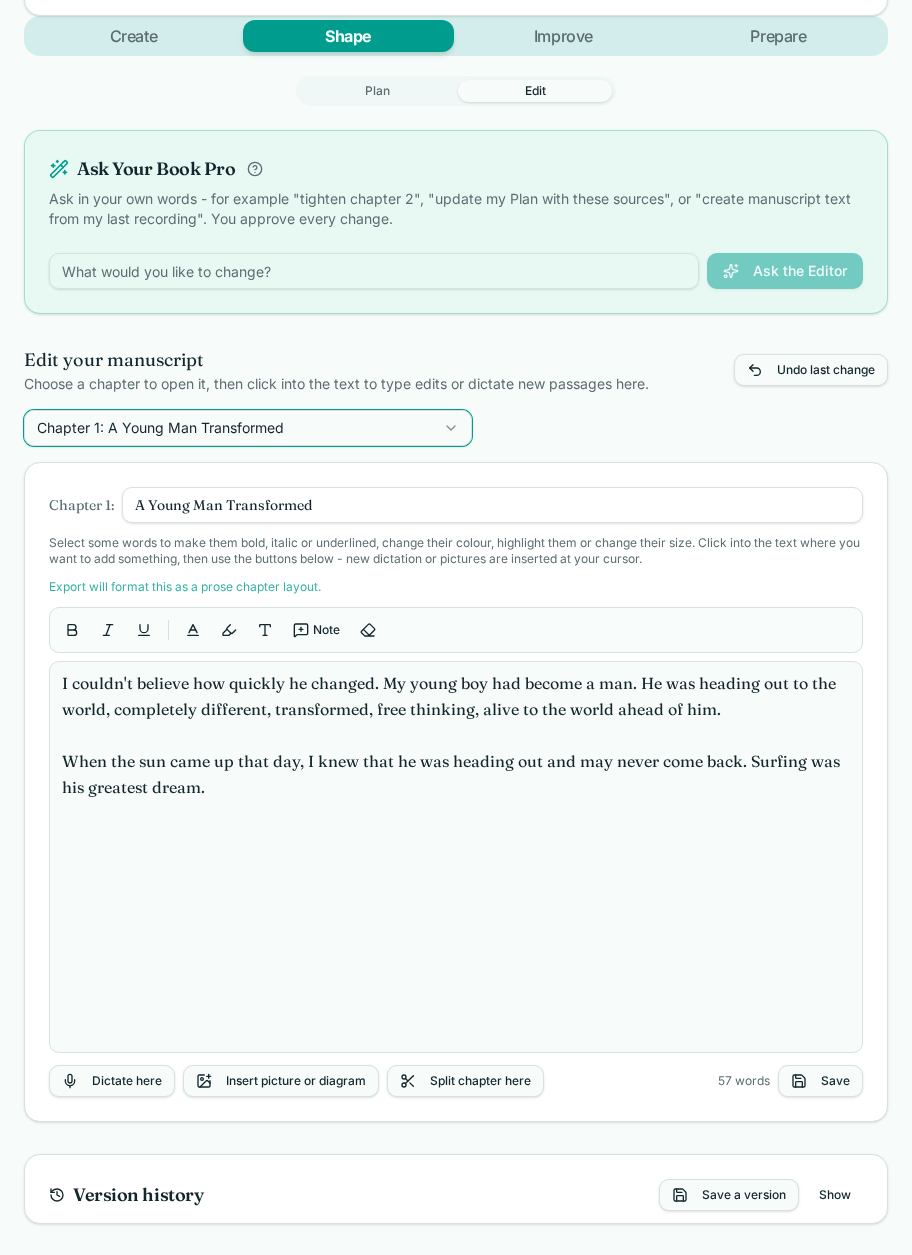
Edit, inside Shape. Everything you have written, organised into chapters you control.
What to look for
- The chapter dropdown includes chapters created from your approved spine, not just ones you typed.
- Draft text added by AI appears in red italics until you approve it, so you always know what is yours.
- Reordering, renaming and deleting chapters happens in the Chapter spine on the Plan sub-tab.
- Sources and transcripts are managed separately - see the audio-to-book guide.
How to use the Editing Suite well
- Be specific about the job: “tighten this scene” beats “make it better”.
- Ask for options rather than replacements - you can accept, edit or discard anything proposed.
- Proposed text is always shown to you first. Nothing enters your manuscript without you choosing it.
On screen: Transcripts, speaker names and every other source attached to the book are managed one slider along, in Shape → Sources - see the next section.
8. Shape → Sources: the material behind the book
Sources is the third part of the Shape slider, alongside Plan and Edit. It is where everything attached to the book is managed, separately from the manuscript itself, so you can review what you have without touching what you have written.
- Your own source material - dictations, uploaded audio, podcast episodes, interviews and imported text. The Manage sources card lists each one, with View transcript, View themes & book ideas, Use in my book and Send to Plan. Manage all opens the full line-by-line audit - file name, type, date, word count, minutes used and speakers.
- Background research - a separate card for reference material such as PDFs, documents, notes and images. This is context the assistant can draw on when you ask it to; it is not your book, and it is never silently turned into manuscript text.
- Provenance - material that reaches your book keeps a record of the source it came from, so you can trace any passage back.
- Add New Sources takes you back to Create → Upload to attach more material.
Nothing in Sources edits your manuscript on its own. Material moves on when you choose it: sent to Shape → Plan as notes, or used while drafting in Edit.
9. Importing and exporting Scrivener projects
If you already work in Scrivener, you do not have to flatten your project into a Word file or a PDF to bring it here. Go to Create → Upload and choose Import Scrivener Project.
- It is a native project import - your binder structure comes across, not a single block of text.
- A short mapping review lets you confirm where each part of the binder should land before anything is created.
- Manuscript documents become chapters, planning folders become plan material, and research stays research rather than being mixed into your book.
- When you want to go back the other way, Prepare → Export to Scrivener builds a Scrivener project you can open again.
The full step-by-step round trip, including troubleshooting, has its own guide.
Read the Scrivener guide10. Improve: your editorial read
The Improve tab holds a single button - Get Editorial Feedback - and the report it produces. This is not a grammar checker. It reads your manuscript the way a commissioning editor would: structure, voice, pacing, evidence, and whether the book is doing what you said it would do in Plan.
Your book workspace
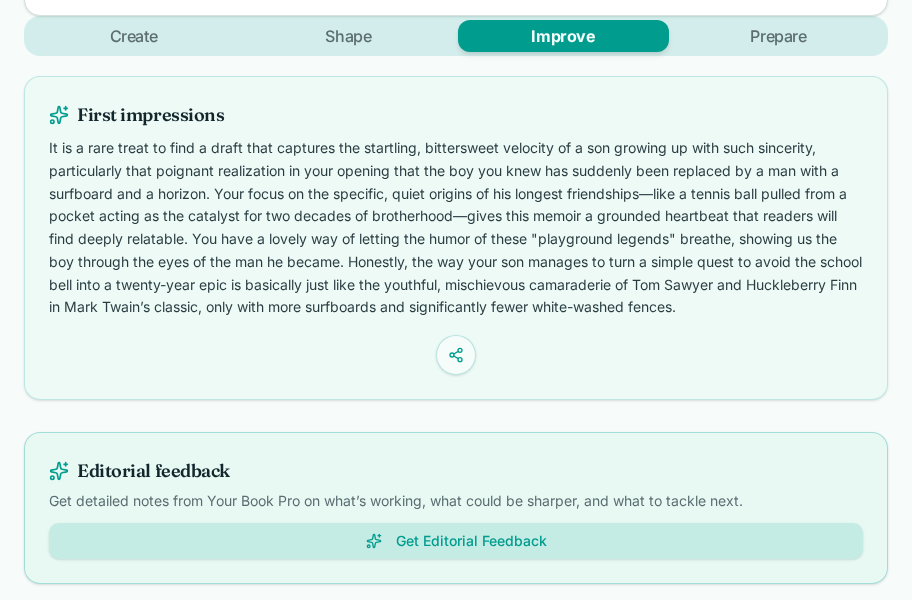
Improve reads the whole manuscript and reports back in order, encouragement first.
What to look for
- Encouragement always comes first - it is not padding, it tells you what to protect.
- Each suggestion can be pinned to Plan so it becomes a working note rather than a passing comment.
- Improve adapts to your genre and to any book modes you have on - poetry keeps its line breaks, scripts are read as scripts, textbooks are assessed against teaching standards.
11. Prepare your finished book
When your manuscript is ready, move to Prepare. This is where Your Book Pro helps turn a completed manuscript into a book that is ready to leave the writing workspace.
In Prepare, you can:
- run the final readiness checks;
- confirm the title, author details and other essentials;
- create or refine the front cover;
- write the back-cover blurb;
- choose an appropriate page size;
- review any safety, rights or fact-checking steps relevant to your book;
- generate a clean reading PDF;
- create the files needed for professional printing;
- use Export to Scrivener if you would rather carry on in Scrivener - the usual route for books that started as a Scrivener import.
The page size matters more than it may seem. It affects the number of pages, line length, margins, image placement, spine width, cover dimensions and printing price. Your Book Pro recommends suitable formats for different types of book while keeping you in control of the final choice. For example, a novel may suit A5, a memoir or leadership book may suit 6 × 9 inches, while a children’s picture book may need a larger square format.
Prepare is therefore not simply an export button. It connects the manuscript, cover, blurb, book size and production files so they remain part of the same project.
Your book workspace
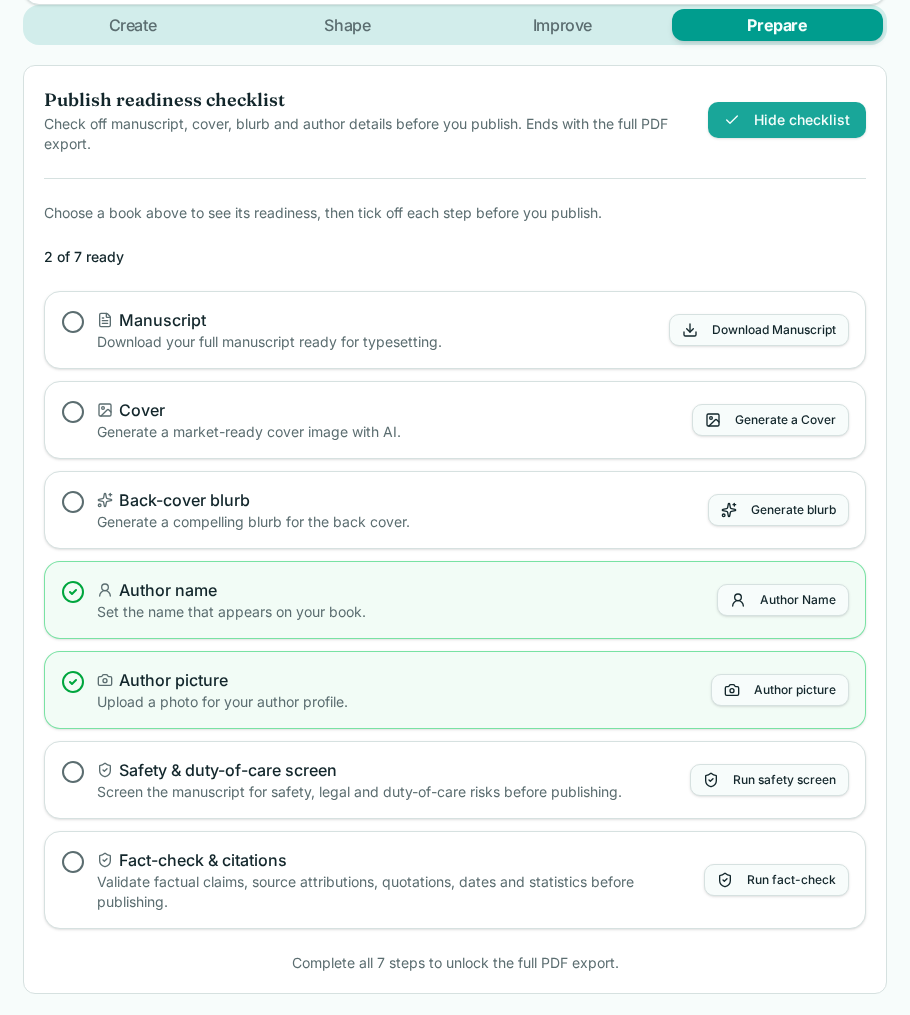
The readiness checklist. Rows you have completed turn green and count toward the total at the top.
What to look for
- The counter at the top is the fastest way to see how far off you are.
- Each row has its own action button - nothing here is hidden behind another page.
- Author name and picture take you to your Account and come straight back.
- Fact-check only appears for genres where factual claims matter.
What each check is actually for
- Manuscript - the working download. Includes your plan notes so you can read the thinking alongside the text.
- Cover and blurb - generated from your own material, then fully editable. A blurb you disagree with is still a useful first draft.
- Safety screen - flags legal, safety and duty-of-care risks before anything is published. Memoir in particular benefits from this.
- Fact-check & citations - for non-fiction, validates claims, source attributions, quotations, dates and statistics, and tells you where it could not verify something.
12. Print, self-publish or approach publishers
Once the book is prepared, you can decide what should happen next.
Order a small number of printed copies
Your Book Pro supports small print runs of 1–50 private copies. You might begin with:
- one proof copy to inspect;
- several copies for family or contributors;
- advance copies for reviewers;
- books for a workshop, course, church, event or private audience.
You choose the physical specification of the book, including:
- paperback, hardback or another available binding;
- black-and-white, standard-colour or premium-colour pages;
- compatible paper type and weight;
- matte or gloss cover;
- quantity and delivery method.
Your Book Pro then connects the prepared manuscript to the printing process, creates the correctly sized interior and cover files, checks them with the printer and shows the estimated price for the printed copies. Delivery and applicable tax are shown separately before an order is placed.
This is what makes Your Book Pro genuinely end to end: idea → writing → editing → preparation → printer-checked files → printed copies
Ordering private copies does not automatically publish the book, give it an ISBN or list it with retailers. It simply allows you to receive physical copies of the book you have created.
Self-publish your book
You can also use your prepared manuscript and cover to publish through platforms such as Amazon KDP, IngramSpark, Draft2Digital, Apple Books or Kobo. Self-publishing normally involves additional decisions about ISBNs, retail pricing, distribution, metadata and where the book will be sold.
Approach an agent or publisher
Your Book Pro can also help you prepare for submissions to agents and publishers. The material required varies by genre. A novel may need a query letter, synopsis and opening chapters, while a business or non-fiction book may be pitched through a proposal and sample chapters.
Read the detailed printing guide
This beginner’s guide gives only an overview. For the complete process — including small print runs, book sizes, binding, colour, paper, printer validation, pricing, delivery, Lulu fulfilment, proofs, refunds and returns — read How to Print a Small Run of Your Book — From Manuscript to Copies in Your Hands.
Print-file checking and pricing are live. Final checkout for printed orders is being switched on.
Related specialist guides
Two workflows have their own detailed guides rather than being repeated here:
- How to turn audio recordings into a book - the seven-step wizard for podcasts, talks, lectures, sermons and interviews.
- How to import a Scrivener project into Your Book Pro - and export it back again - the full native Scrivener round trip.
If you are deciding what belongs in your workflow before you begin, you can compare book writing software by use case, AI role, price and workflow.
FAQ
Do I have to dictate, or can I type?
Either. The Raw material box on the Create tab is a normal editor - you can start typing into it on a brand new book before you have recorded anything, and dictated words land in the same box.
What is the difference between Exact text and Light edit?
Exact text transcribes what you said, word for word. Light edit removes ums, ahs, filler words and repetition for a cleaner read, and formats speech with quotation marks. Both keep your wording and meaning - Light edit never rewrites your sentences.
What does the book dictionary do?
It teaches transcription the names, places and unusual words in your book. You add the correct spelling plus the ways it is commonly misheard, and every future transcript for that book is corrected to your spelling automatically.
Do I need Pro to write a book?
No. Recording, transcription, typing, manual chapters and the Plan section (inside Shape) are all available on a Plus account - pay as you go, with 1,000 free credits when you verify your email. See 'How Plus works' above. On Plus, the AI tools - chapter breaks, editorial feedback, the readiness checks and styled exports - are pay as you go with credits; Pro includes them in one annual plan.
Where does my recording go?
Audio is saved on your device first, then transcribed when your connection allows. Your book, recordings and transcripts are private to your account.
Start with ten minutes
Open a new book, press record, and say the part you already know by heart.
Start my book